Beetroot, fetta and pesto pizza

Leave a comment

We eat loads of home made pizza at our place. It’s quick, easy, can be topped with almost anything in the fridge or pantry and is guaranteed to one of the few family meals that makes everyone happy. Yep, that includes Mr 7 yrs, who generally refuses to eat anything anyone else requests. Or anything new. Or anything that looks remotely healthy or interesting. I made this one for my own Mum on Mother’s Day and it was a definite win.

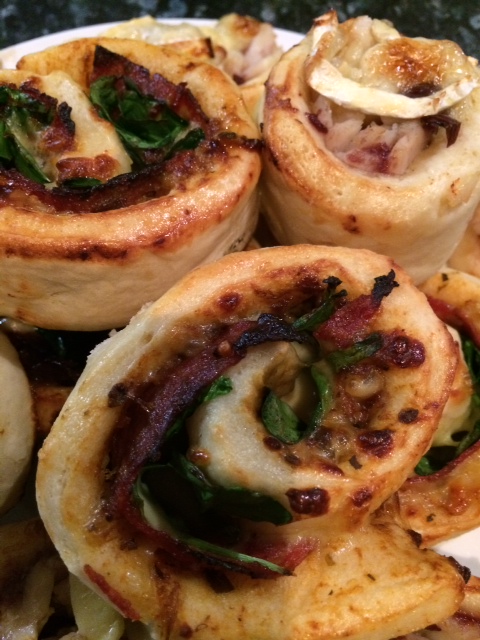
Except for Mr 7. He had an egg and bacon pizza instead.

pizza_mandy

WHAT YOU NEED:

BASE

250ml tepid water

2tbs olive oil

1tsp salt

2tsp sugar

450g (or 3 cups) of plain flour. Or wholemeal flour. Or you can use specialty bread flour – I never do.

3tbs dried yeast. I use the Tandaco brand and store it in the fridge.

TOPPING

Basil pesto

Grated Mozzarella cheese. Use high quality. Your taste buds will thank you for it.

Feta cheese. I prefer Persian feta to anything else, especially on pizza. Persian feta is softer, silkier and doesn’t dry out in the oven.

Cherry tomatoes

A red onion

Roast beetroot cut into bit-sized pieces. While I do love home-grown beets, for this kind of recipe I always buy the pre-cooked, pre-peeled stuff from the deli or veggie section of the supermarket. Saves on time, mess and stained fingers. Never the canned stuff. Eww.

Fresh flat-leaf parsley

Balsamic glaze. Thicker (and generally cheaper) than balsamic vinegar, this glaze is one of my pantry must-haves. It’s also great on all sorts of salads as well as strawberries!

HOW IT’S DONE:

Well, for the dough, I cheat and use my bread maker on the dough setting. In fact, it’s pretty much all I use the bread maker for. Just add the listed ingredients in the order above (wet to dry), press the button and that’s it. If you don’t have a bread maker, just add the ingredients to a large bowl in reverse order. Mix well with your hands until it forms a dough and knead for ten minutes. Shape into a ball, place in a (larger) bowl, cover with plastic wrap or a damp tea towell. Place in a warm position for 30 minutes or until it doubles in size.

We find one batch makes 4 smallish pizzas, depending how thick or thin you like your base. We like ours on the thin side. I generally make two batches for our pizza-loving family of five, which does require a little forward planning to account for time. Just divide up your dough and roll out on a lightly floured surface to size. Easy.

Pre-heat oven to at least 250 C. If your oven gets hotter – lucky you! We often cook our pizzas in the BBQ with the lid closed for this reason.

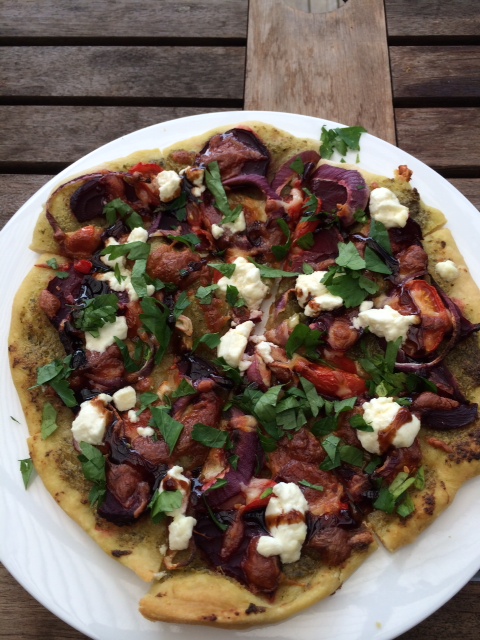
For the toppings, use the pesto as your sauce rather than tomato paste. Top with beetroot, sliced cherry tomatoes, sliced onion and a sprinkling of mozzarella cheese (mostly just to hold it together). Cook until the cheese has begun to melt, and the base is no longer doughy. Add broken-up feta and cook for a further five minutes, or until the mozzarella is bubbling. Remove from the oven or BBQ, sprinkle with chopped parsley and a swirl of balsamic glaze. There you have it – healthy vegetarian pizza that looks great too.

Savoury Scrolls

Leave a comment

I’ve made these scrolls three times over the last week for my little family. Cheese and vegemite is definitely the winning combination for my sons, followed closely by cheese and bacon. Normally I’d make life easier by making the dough in the breadmaker, but sadly mine died a sudden death a couple of weeks ago (gasp! I know, right?) Of course, you could use any combination of toppings that tickle your fancy – let me know what you come up with!

vegemite scrolls

Dough

450 g / 3 cups plain flour

2 tsp sugar

1 tsp salt

250 ml water

2 tbs olive oil

3 tsp yeast


Toppings

Vegemite / tasty cheese

Bacon pieces / tasty cheese

Shaved turkey / Camembert cheese / cranberry sauce Salami / spinach / tomato chutney / mozzarella cheese

In a large bowl, place measured ingredients in the order listed above. Bring together and mix with your (clean!) hands until you form a dough. Remove from bowl and place on a flat, floured surface and knead for ten minutes…you can thank me for the workout when you’re done. Place back into the bowl and cover with oiled plastic wrap. Tip: olive oil in spray form on Glad Wrap works brilliantly. Place in a warm spot for aprox 30 minutes, or until your dough has doubled in size. After rising, punch the dough down with your fist and repeat the kneading and rising process.

Preheat oven to 200 degrees C.

To make, divide your finished dough into two equal pieces. With a floured rolling pin, roll each piece out into as much of a rectangle as possible, around 1/2 cm thick. Keeping the widest part of the rectangle dough closest to you, spread generously with desired toppings. Carefully roll the dough up away from you, and then cut into 2cm thick slices. Place each scroll onto a greased oven tray and brush with egg. Bake for aprox 20 minutes, or until your scrolls begin to turn golden brown or cheese is bubbling.

Best eaten immediately!

turkey scrolls

My USA foodie adventure #4

Leave a comment

San Francisco is famous for many things. The Golden Gate Bridge, Alcatraz, Gay Pride, the Painted Ladies, Lombard street – the twistiest street in the world…the list goes on and on. And then – there’s the clam chowder.

USA-cc2


One of my foodie ambitions was to try the famous San Franciscian chowder in a sourdough bread bowl while we were in town, and I wasn’t disappointed. Different versions are available from every second street vendor, but we got lucky on our very first purchase.

We stayed right on Fisherman’s Wharf, almost directly across the road from the world-renowned Boudin’s Sourdough Bakery – also the oldest bakery in the city. After a long day bus-touring around town, my beloved popped out to grab takeaway for the kids, and returned with this to our hotel: The original clam chowder in a bowl. You can see below how excited I was:

USA-cc1

It was so omg delicious that we returned the next day for more, this time eating in at the downstairs cafe-style outdoor dining room. By the way, chowder goes to down really well with beer….

And finally, on our last night in San Francisco, we returned again to Boudin’s with our entire party of 16. This time we ate upstairs, which is more of a fine-dining experience. While I skipped the chowder this time around (for lobster), my 10yr old ordered it from the kid’s menu. Check out the turtle bread that it was served in!

USA-cc3

So clam chowder achievement was unlocked. And it lived up to all expectations!

Baked Camembert and Strawberries with Balsamic Glaze

Leave a comment

We have this serious glut of strawberries going on at our place right now. I know, I know. Tough problem to have, right? Well, it’s not really a problem. I can tell you there’s not many of those delicious red berries going to waste. Our patch is netted, so we’re not sharing too many with the local wildlife (here, it’s not just the insects and the birds, but reptiles like blue tongue lizards and baby skinks as well). The chickens are getting the few imperfect ones, and the rest are either scoffed on the spot by my kids, or actually making it inside for me to play with. I have a couple of strawberry recipes for you – this first one is a simple savoury dish to serve with friends as an entrée or snack over drinks.

Baked camembert

Camembert and strawberries

What You Need:

  • 3/4 cup of fresh strawberries, half some of them, dice the rest.
  • 1 round of camembert cheese. Like everything, buy the best you can afford. For this recipe, it’s best (but not essential) to buy one that comes in its own box.
  • Balsamic glaze (found in the salad dressing isle of your supermarket).
  • Bruschetta or crusty bread to serve.
  • Pancetta or prosciutto to serve.
Baked camembert 3

Baked in balsamic glaze

How it’s Done:

If you’re lucky enough to purchase a camembert in its own box, all you need to do is remove it, and any plastic packaging. Score the top of the rind with a sharp knife in a criss-cross pattern, about half a centimetre deep. Then pop it back in box, without the lid. Push the strawberry halves into the scored rind, sprinkle the diced pieces on top, reserving a few to keep fresh to serve,

Bake for around 12 – 15 minutes in a pre-heated oven at 180 degrees C, until cheese is melted through – beware of over-baking though. Camembert has a habit of re-setting if it over cooks.

To serve, place on a cheese platter, drizzle with plenty of balsamic glaze. Add crusty bread and prosciutto if desired. Sounds like a strange combination – but it’s delicious!

Baked Camembert 2

Soooo delicious!

If you don’t have a camembert round in its own box – I didn’t – don’t despair! Cut a square of baking paper, and another of foil. Place the baking paper on top of the foil, the unwrapped cheese on top of that, and, holding firm, tie it with kitchen twine. This helps to keep the camembert in shape and stop any leakage of hot oozing cheese all over your oven tray. You should be able to see where I’ve tied the twine in the ‘before’ photo here. Otherwise, prepare and serve exactly the same way.

Chicken and Leek Pie

Leave a comment

Pies are such a pain in the neck to make, even when you’re cheating. First it’s the pastry base, then the filling, then the pastry top…but if your kids are old enough (like mine have just become) to understand that they shouldn’t touch the hot, hot ramekin bowl that their pie is served in – well, it makes life a lot easier. There goes those pesky bases, right out the window! Suddenly, pies can become one of the quickest, easiest and of course, yummiest home baked meals.

Chicken and Leek Pie

The Mixture

What you need:

*1 store purchased BBQ chicken. Use the fillets, chopped (yes, of course you can cook up a couple of chicken fillets yourself – but this is the cheat’s version, ok?).

*8 rashers of bacon, trimmed of fat and rind and then chopped.

*1 commercial brand jar of Bechamel sauce (normally used for lasagne)

*Half cup of cream or milk

*1 clove of garlic

*2 cups of sliced leeks

*3 spring onions, chopped

*3 – 4 sheets of commercial frozen puff pastry

*A handful of grated tasty cheese.

*Salt and pepper to taste

*Egg wash – mix an egg with a splash of milk

*5 – 6 small ceramic ramekins, depending on how many people you need to feed!

Chicken and Leek Pie_2

Ready for the oven.

How it’s done:

Into a hot pan, add chopped garlic and leeks. Allow the leeks to soften, then add your bacon. Once that begins to brown, add chicken, Bechamel sauce and milk (or cream). Allow to simmer and reduce until mixture is thick. Finally, add spring onions (we like ours to stay a little crunchy) and seasonings. Turn your pan off, and allow it to cool slightly, before stirring through grated cheese.

While your mix is cooling, pre-heat oven to 180 degrees C. Thaw out your puff pastry sheets, and cut to size big enough to cover the top of each ramekin. I use a small saucer as a guide. Place a ladle-sized scoop of the chicken and leek mixture into each ramekin, filling it to about ¾ full – allow for some bubbling while it’s cooking. Then, splash some egg wash around the perimeter of the ramekin with a pastry brush, and pop the pastry lid on, pinching it firmly around the edges. Prick the tops with a knife or fork to allow steam to escape, and give the whole thing another go with the egg wash.

Bake for around 15 minutes, or until the pastry tops are golden brown. Serve with chips and vegetables. And don’t forget to remind the rest of your family that the ramekins are hot!

Chicken and Leek Pie_3

Chicken and Leek Pie

Sushi – the whole story

Leave a comment

We eat loads of Japanese food at our place. It’s healthy, clean and doesn’t make you feel like you need a nine hour nap when you’re done feasting. But best of all, one meal can cater for everyone’s tastes – especially when we do these sushi rolls.


sushi 1

Ingredients

*Sushi rice. Don’t try and swap it for another type of rice – it just doesn’t work. You can find all these Japanese ingredients in the Asian section of your local supermarket.

*Nori – aka flat sheets of seaweed.

*Sushi vinegar.

*Japanese mayonnaise – optional.

*Wasabi – green Japanese horseradish. Optional, and packs a punch so use it sparingly.

*Japanese ginger to serve – optional.

*Japanese soy sauce to serve.

*Fillings – now this is where you get to customise your sushi rolls. At our place, favourite ingredients include: carrot, cucumber, capsicum, tofu, salmon (raw from the fish shop – make sure you ask for sushi grade) as well as smoked salmon, caviar, egg, avocado and prawns. You could also use crab meat, lettuce, shredded chicken or tuna.


sushi 2

It’s all in how you roll!

Rice: First up, you need to cook your rice. Add equal amounts of water and rice to the pot – eg: if you use two cups of rice, add two cups of water (this is the amount used to make the sushi rolls pictured). Bring rice to the boil for about 3 minutes, then reduce heat to medium. Once the water is just about absorbed, turn to low for a further 5 minutes, then turn off the heat and let rice stand 15 minutes with the lid on. Stir through 2 tablespoons of rice vinegar. We usually cook our rice a couple of hours before it’s needed and refrigerate until needed.


Filling: Slice all ingredients into strips. Carrot, cucumber, capsicum, tofu (my favourite!), avocado etc. With the egg, make a plain egg omelette and then slice into fine strips. Prawns and other seafood can also be sliced. The key here is to be organised, with everything ready for rolling on the bench.


sushi 4

And slice!

Roll ‘em up! This can be tricky the first time, but it gets easier with practice. Lay your sheet of nori on a sushi mat (also available in the Asian food section at the supermarket). Spread your cooled rice evenly over the top, leaving gaps at the top and bottom. Then, add your fillings, including mayonnaise or wasabi. It’s much easier to roll if you don’t add too much, especially for beginners.

Once you’re loaded up, start at the end closest to your body, use the mat to guide your nori, and roll up and away from yourself. Be firm, take it slowly and remember to tuck the end closest to you. Once your sushi roll is rolled, it should resemble a long cylinder.

Pop it aside, and start on the next one. Repeat. Refrigerate for 10 or 15 minutes to make the rolls easier to slice, using a VERY sharp knife. Again, take it slowly and try to slice your rolls evenly. We usually discard the end pieces.


Serve with soy, mayonnaise, ginger and more wasabi (if you’re game!)

sushi 6

And present it!


*With thanks to Simon, my very special hand model!