Book Review – MYTHMAKER by Marianne de Pierres

Leave a comment

mythmakerBack in 2014 when I read and reviewed Marianne de Pierres’ latest novel, the genre-mashing-spaghetti-western-science-fiction-and-the-rest: ‘Peacemaker’, I asked for more. More of everything. More street politics, more insight into the large cast of fascinating side-characters, more of the government conspiracies. Peacemaker was just so much fun, so fast and entertaining, but it felt like the tip of the iceberg. The world de Pierres had created was so vast, Peacemaker just didn’t feel like it was long enough. I didn’t want it to end. But now, we have ‘Mythmaker’. And, as readers, we get the more I was after. And then some.

Set just a few weeks after the action-packed finale of Peacemaker, Mythmaker picks up with de Pierres’ trademark way of throwing the reader right into the scene, and protagonist Virgin Jackson right into trouble. There’s no mucking around with slow introductions here. Check the blurb:

Virgin’s in a tight spot. A murder rap hangs over her head and isn’t likely to go away unless she agrees to work for an organisation called GJIC (the Global Joint Intelligence Commission).
Being blackmailed is one thing, discovering that her mother is both alive and the President of GJIC is quite another. Then there’s the escalation of Mythos sightings and the bounty on her head.
Oddly, Hamish is the only one she can rely on. Life is complicated.

The complications don’t stop there, either. Something is up with Virgin’s BFF, the fabulous Caro (the outcome of which is handled with extreme respect by Virgin), we see more of her softer, more compassionate side – along with her fearlessness and uncompromising passion to protect who and what she loves. Virgin hasn’t lost her penchant for walking into trouble though, and there were a number of scenes where I wanted to scream at her: ‘NO, NO, NO DON’T GO IN THERE!’

While caring for Birrimum Park – the last remaining natural habitat – as Park Ranger in a futuristic world is still Virgin’s true passion, she spends more time away from it (by necessity) in order to save it this time around. We see more mythology combined with the hi-tech gadgetry, weapons and conflict. We also get more of the fabulous cast of supporting characters; some return from Peacemaker, plus a couple of newbies to spice things up and allow us to get to know a different side to Virgin. Her brilliant cowboy/secret agent partner, Nate SixKiller is back, as is the mysterious Hamish (who gets even more mysterious), and we learn there’s even more to the ex-lover, formally known as Heart, than we already did.

I can easily say that while I very much enjoyed Peacemaker, I adored Mythmaker. It’s like nothing else I’ve read before. The mashing of genres, the world, the action of the city and the solace of the park, the suspense and the detective work. Marianne de Pierres makes this type of story-telling an art-form, but best of all, she does it with characters and relationships you can’t help but fall in love with.

And still…I want even more. Book 3, please!
Cook Book Review: Bake, Sizzle, and Simple

Leave a comment

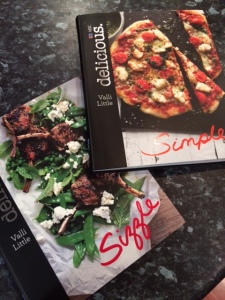
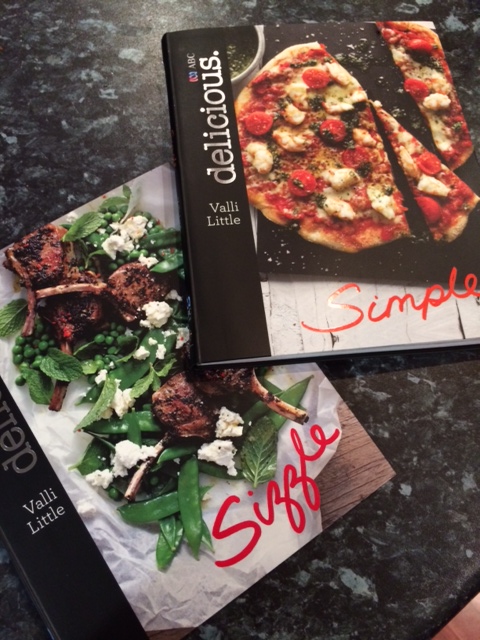
Bake, Sizzle and Simple are three new bite-sized cookbooks from Valli Little and the team behind Australian food magazine, delicious.

I have Sizzle and Simplefrom the collection, and can guarantee I’ll also be checking out Bake in the near future. While these cookbooks might be small, they each contain sixty recipes – all of them simple and achievable even for those who aren’t so awesome in the kitchen. The layout is clear, with one recipe and the corresponding colour photo across each double page spread. The gorgeous photos alone are enough to get you cooking.

sizzle simpleSizzle concentrates on food that, well, sizzles! Hot flame cooking. BBQ and grill. This one is definitely for the carnivores, though it does have a small number of vegetarian recipes. Dishes are drawn from cuisines all over the world, and while a couple are more decadent main meals, most are easy brunches or mid-week meals. There’s Eye Fillet Steak with Raspberry Sauce, Salmon Skewers with Fennel and Orange Salad, Tuna Wasabi Burgers, Strawberry and Brie Sandwiches and Fried Eggs with Bacon Jam. Yes, you read that right. Bacon Jam. With ingredients like bourbon and brewed espresso. Oh, my… I think I’ll be checking that one out first…

Simple is just as the title portrays. Simple, fast recipes that rely on pantry staples such as pasta, rice or couscous and match them with fresh ingredients. See? Simple. There’s twists on the old standards like Spaghetti and Mussels, Homestyle Meatloaf and Singapore Noodles. Then there’s the Macadamia Crumbed Chicken Strips with salsa, Prawn, Chilli and Pesto Pizza and the Lamb and Haloumi Sausage Rolls. Like Sizzle, Simple also has a small number of vegetarian dishes.

Bake, Sizzle and Simple join Spice, Indulge and Slow in this series of mini-books. You’ll find loads of inspiration between the pages, and their small size makes them easy to store in an easy-to-access kitchen cupboard or shelf.

Sizzle and Simple

by Valli Little and the delicious team

Sizzle ISBN – 978-0-7333-3363-7

Simple ISBN – 978-0-7333-3364-4

ABC Books

Sponge Kisses

1 Comment

With Father’s Day imminent here in Australia, I thought I’d make one of my own Dad’s favourites for this month’s Cook Club – Mum’s Sponge Kisses. Now, mine didn’t turn out quite as soft and fluffy as Mum’s (what IS that phenomenon that makes your mother’s cooking better than anything, ever?) and they did collapse a little as they cooled…but hey, it was my first go and my family still gobbled them up, so I’m going to take small successes where I can.

Sponge Kisses are basically two small rounds of sponge cake sandwiched together with jam (any flavour. You pick) and whipped cream, then dusted with icing sugar. Kind of an old-fashioned treat, I guess. They’re quick, easy and make minimal mess in the kitchen.

WHAT YOU NEED:

1/2 cup plain flour

1/2 cup corn flour

1 teaspoon baking powder

3 eggs, separated

3/4 cup caster sugar

Whipped cream and jam to fill

Icing sugar to dust

sponge kissesHOW IT’S DONE:

Pre heat oven to 200c, line oven trays with baking paper

With your electric mixer, whip egg whites until they have stiff peaks. Gradually add caster sugar, then egg yolks one at a time.

In a separate bowl, sift plain and corn flours together, along with the baking powder. Gently fold this mix through the egg mix.

Cooking in batches, spoon heaped teaspoons of mix onto lined trays allowing room for them to spread. They only take 4-5 minutes, or until you notice them beginning to change colour. Remove carefully using a spatula – they’ll still be very soft – and place on a rack to cool.

Sandwich together using jam and whipped cream (or just cream if you prefer). Some people like to add the Kisses to the fridge at this stage for a couple of hours to soften up. Personally, I prefer to serve immediately after adding the filling, with a generous dusting of icing sugar. If needed, you can store the unfilled Kisses in a sealed container until serving time.

Next time, I might try tweaking the recipe a little by adding a touch more plain flour and baking powder.

Home made apple pie

Leave a comment

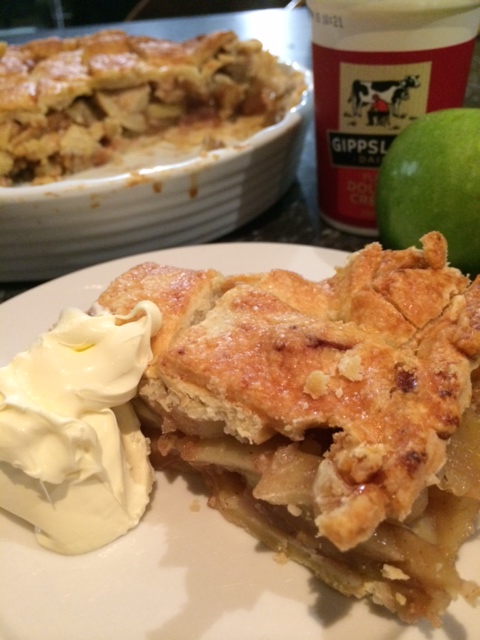
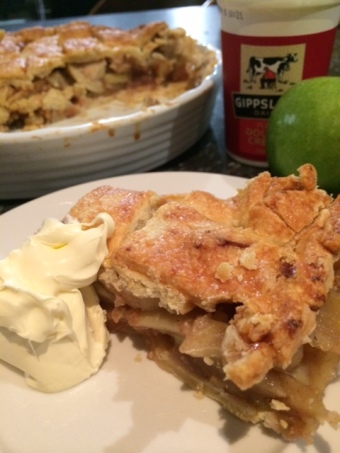
Now that the weather is starting to cool in our part of the world, I thought it would be a good idea to check out a warm dessert this month. Everyone loves apple pie, and I’ve used this recipe more times than I can count. While I found the original recipe in a Mrs Field’s Cookbook (yes, she of those amaaazing cookies fame), I’ve Mandy-ised it a bit over the years, playing around slightly with ingredients and quantities~Mandy

apple pie 1

What You Need:

Crust

3 cups of plain flour

Grated lemon zest from one large lemon

1 cup of butter (please don’t use margarine!)

Aprox 6 to 8 teaspoons of ice water

Filling

8 to 10 large Granny Smith apples, peeled and then thinly sliced

2 teaspoons of ground cinnamon

1 cup of white sugar

½ cup of brown sugar (packed tightly)

½ cup of cornflour

1/3 cup of chilled butter, cut into small cubes


You’ll also need one large egg for the egg wash, a little more white sugar to sprinkle on top and butter to grease your pie dish. I use a 22cm ceramic dish, though a tin one is fine.

apple pie 5

How It’s Done:

Crust:

Mix the flour and lemon zest together in a large bowl – a wire whisk is easiest. Add the butter and either cut it in using two knives in a crossing motion, or if you’re a bit slack me, throw it all in the food processor for a quick spurt until it resembles breadcrumbs. Slowly add the iced water one teaspoon at a time until the dough comes together and you can push it into a ball. Divide the dough in half and flatten both halves into disks. Wrap tightly in cling wrap and pop into the fridge for at least an hour, or until it firms up.

apple pie 4

Filling:

In a large bowl, combine sugars, cinnamon and cornflour. Again, a whisk is the easiest way to do this efficiently – you won’t need the processor! Add the apple slices to this mix and toss with a spoon until the apple slices are completely covered.

At this stage, it’s a good idea to get your oven preheating. Set it to 200 degrees Celsius.

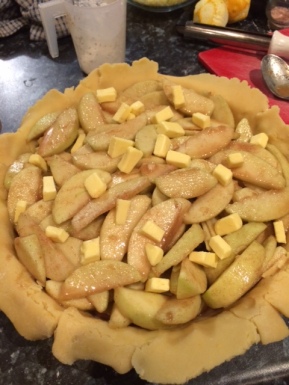
Once your dough is firm, prepare some bench space with sprinkled flour. Using a floured rolling pin, roll out one piece of dough into a circle aprox 25cm in diameter. Gently (very gently) fold the crust in half and then quarters. This makes it much easier to handle. Grease your pie dish and carefully place the corner of your dough into the centre of the dish and unfold, leaving excess dough hanging over the edge. Spoon in your apple filling and sprinkle butter cubes over the top.

For the top crust, you can use one of two methods:

Roll out and then fold the remaining pastry half into quarters as you did the first time. Place over filling, crimp the edges together as decoratively as you can, and add a couple of slits into the top with a knife to allow steam to escape.

OR

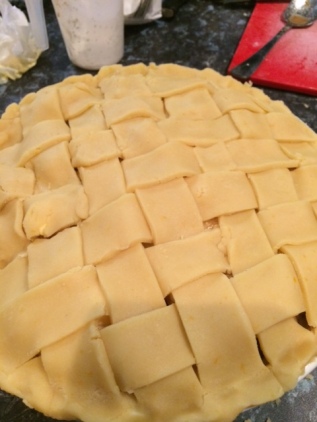
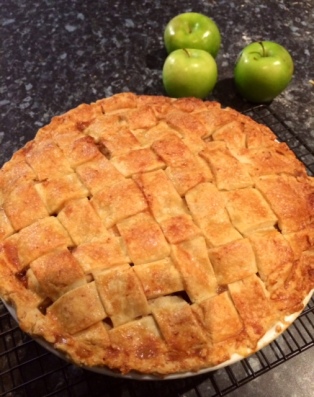
I prefer to roll out the remaining pastry half into a more rectangle shape, and cut into strips. Add strips to the top of your pie in a weaving pattern, which is a little fiddly, but will give you a much more traditional-looking result.

Either way, once done, whisk egg in a cup and brush over the top of your pie, then sprinkle with white sugar. Bake for 20 minutes, then reduce heat to 175 Celsius for a further 30 minutes, or until the crust is a deep golden brown.

Remove from the oven and allow to cool for at least 15 to 20 minutes. It will still be warm, but this cooling time gives the filling a chance to solidify a little, making it easier to slice. Serve with cream, ice cream or custard (or you know, all three…)

PS – if you ever happen to come across one of Mrs Field’s Cookbooks, do yourself a favour and buy it! I have two. They’re fantastic, and oh, so pretty to look at. All recipes have American ingredients, weights and measurements, but I’ve found it quite simple to convert or substitute.

apple pie 2

Beetroot, fetta and pesto pizza

Leave a comment

We eat loads of home made pizza at our place. It’s quick, easy, can be topped with almost anything in the fridge or pantry and is guaranteed to one of the few family meals that makes everyone happy. Yep, that includes Mr 7 yrs, who generally refuses to eat anything anyone else requests. Or anything new. Or anything that looks remotely healthy or interesting. I made this one for my own Mum on Mother’s Day and it was a definite win.

Except for Mr 7. He had an egg and bacon pizza instead.

pizza_mandy

WHAT YOU NEED:

BASE

250ml tepid water

2tbs olive oil

1tsp salt

2tsp sugar

450g (or 3 cups) of plain flour. Or wholemeal flour. Or you can use specialty bread flour – I never do.

3tbs dried yeast. I use the Tandaco brand and store it in the fridge.

TOPPING

Basil pesto

Grated Mozzarella cheese. Use high quality. Your taste buds will thank you for it.

Feta cheese. I prefer Persian feta to anything else, especially on pizza. Persian feta is softer, silkier and doesn’t dry out in the oven.

Cherry tomatoes

A red onion

Roast beetroot cut into bit-sized pieces. While I do love home-grown beets, for this kind of recipe I always buy the pre-cooked, pre-peeled stuff from the deli or veggie section of the supermarket. Saves on time, mess and stained fingers. Never the canned stuff. Eww.

Fresh flat-leaf parsley

Balsamic glaze. Thicker (and generally cheaper) than balsamic vinegar, this glaze is one of my pantry must-haves. It’s also great on all sorts of salads as well as strawberries!

HOW IT’S DONE:

Well, for the dough, I cheat and use my bread maker on the dough setting. In fact, it’s pretty much all I use the bread maker for. Just add the listed ingredients in the order above (wet to dry), press the button and that’s it. If you don’t have a bread maker, just add the ingredients to a large bowl in reverse order. Mix well with your hands until it forms a dough and knead for ten minutes. Shape into a ball, place in a (larger) bowl, cover with plastic wrap or a damp tea towell. Place in a warm position for 30 minutes or until it doubles in size.

We find one batch makes 4 smallish pizzas, depending how thick or thin you like your base. We like ours on the thin side. I generally make two batches for our pizza-loving family of five, which does require a little forward planning to account for time. Just divide up your dough and roll out on a lightly floured surface to size. Easy.

Pre-heat oven to at least 250 C. If your oven gets hotter – lucky you! We often cook our pizzas in the BBQ with the lid closed for this reason.

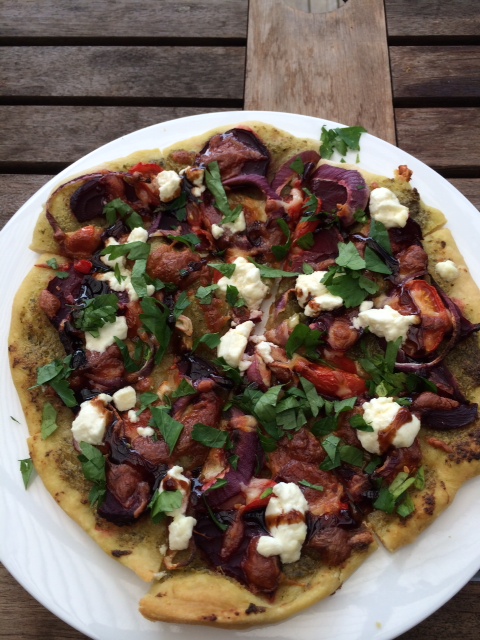
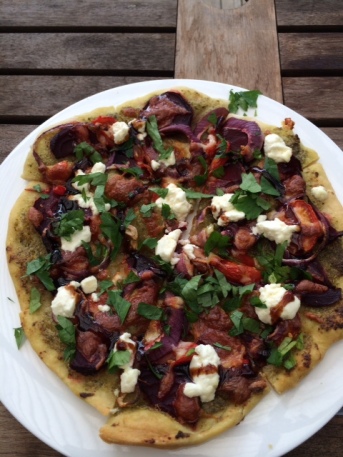
For the toppings, use the pesto as your sauce rather than tomato paste. Top with beetroot, sliced cherry tomatoes, sliced onion and a sprinkling of mozzarella cheese (mostly just to hold it together). Cook until the cheese has begun to melt, and the base is no longer doughy. Add broken-up feta and cook for a further five minutes, or until the mozzarella is bubbling. Remove from the oven or BBQ, sprinkle with chopped parsley and a swirl of balsamic glaze. There you have it – healthy vegetarian pizza that looks great too.

Lemon, lime and passionfruit cheesecake

Leave a comment

So, a couple of weeks ago, the most fabulous Marianne de Pierres made a request for Cook Club. MdP doesn’t make too many requests. In fact, I pretty much get to do whatever I want for this column. So, of course, I agreed.

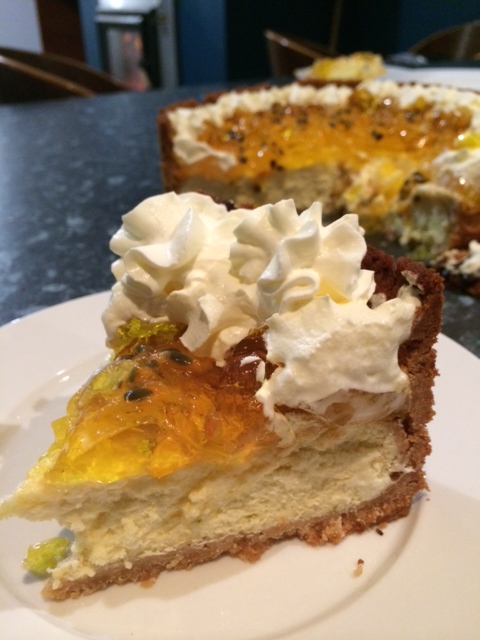
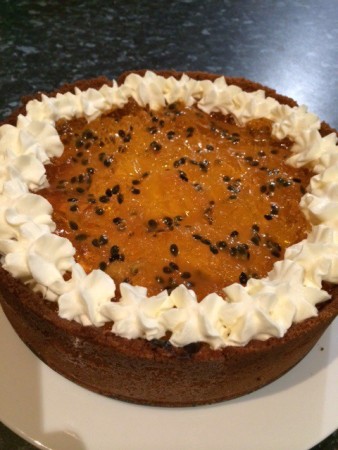
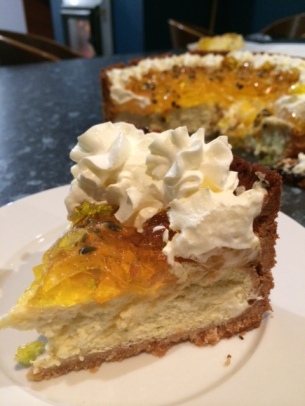
Cheesecake. Cheesecake! Of course, why hadn’t I thought of doing one before now? Well, that would probably be because…shock, horror…I’ve never made one. Okay, there was that fairly disastrous attempt for Christmas dessert about 18 years ago, but otherwise – nope. Cheesecake virgin. For a first real attempt, I’m happy with the result, though I’ll make some changes next time (see note at end of this post). It was demolished by my family, who are honest – if at times, harsh! – critics of anything new that comes out of my kitchen.

cheesecake 2 2

What You Need:

I used a 22cm spring-form cake tin for this recipe.

Butter to prepare the tin.

Crust

350g Arnott’s Nice biscuits, which is about a pack and a half.

175g butter, melted.

Filling

3 x 250g packs of Philadelphia Cream Cheese, softened to room temperature.

¾ cup of caster sugar.

1 teaspoon of lemon zest.

2 tablespoons of lemon juice.

Zest of 1 lime.

Juice of 1 lime.

1 teaspoon of vanilla extract.

1 tablespoon of plain flour.

3 large eggs.

Topping

2 packets of passionfruit flavoured jelly crystals.

Cream for whipping (or err, if you’re slack and in a hurry and can’t find your piping bag… use the fizzy tinned stuff. Not that I’d know about that. Nope.)

cheesecake

How it’s Done:

Prepare your spring-form pan by greasing it with butter. You can line it with baking paper as well, but I didn’t bother. Then, break up your Nice biscuits and add them to your blender. Give them a quick blend until they resemble breadcrumbs. Slowly add the melted butter. Using your fingers and the back of a spoon, push the biscuit/butter mix over the base and up the sides of the pan, trying to keep as much of a uniform thickness as possible. I had a little mix left over. Refrigerate.

Pre-heat your oven to 175 C, or if you have a fan-forced oven like me, drop the temperature to 160 C. Using an electric mixer (I have a KitchenAid stand mixer. Best. Kitchen Toy. Ever.) on low speed, beat cream cheese and caster sugar until blended. Add the lemon and lime zests and juices, along with vanilla. Mix well. Then add the flour and blend again. Add the eggs one at a time, being careful not to overbeat. Remove prepared crust from the fridge and pour the cheese mixture into it.

Before you put your cheesecake into the oven (middle shelf), add a small bowl of warm tap-water to the bottom shelf. This is to help the crust from drying out too much. Bake for aprox. 35 minutes, or until the centre is *almost* set. Remove from oven and cool completely before carefully removing the rim. Refrigerate for 3 to 4 hours.

While your baked cheesecake is chilling, mix jelly as per packet instructions. Once set, chop roughly with a butter knife and spoon onto the top of your cheesecake. Add passionfruit pulp and decorate with whipped cream around the edges – it hides a multitude of sins! If you do (ahem) use the canned whipped cream, remember it does tend to dissolve quickly.

Confessions: Next time, I’m going to bake cheesecake for 25 to 30 mins rather than the full 35, as it was a teeny bit dry. My oven also has ‘hot spots’, and I had to be careful it didn’t bake faster on one side than the other. I also found I had nowhere near enough mixture compared to how high up the tin I’d made my crust, which is why I added the layer of jelly, rather than just candied citrus like I’d originally planned. I will however, be making it again soon after such a great reaction from my family.

Looking forward to seeing how your versions turn out, Cook Clubbers!

Cream for whipping (or err, if you’re slack and in a hurry and can’t find your piping bag… use the fizzy tinned stuff. Not that I’d know about that. Nope.)

Savoury Scrolls

Leave a comment

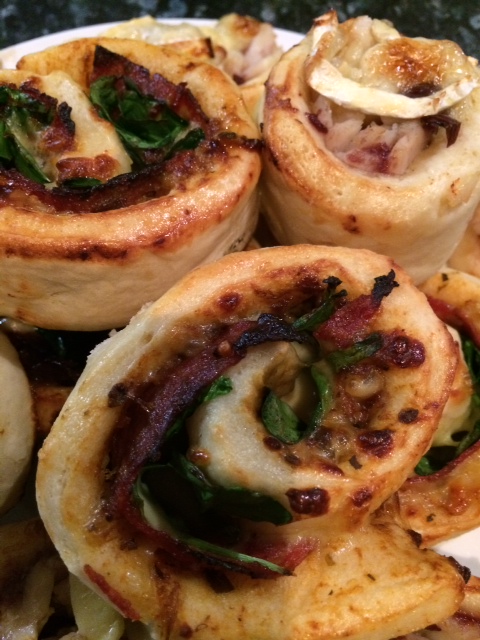
I’ve made these scrolls three times over the last week for my little family. Cheese and vegemite is definitely the winning combination for my sons, followed closely by cheese and bacon. Normally I’d make life easier by making the dough in the breadmaker, but sadly mine died a sudden death a couple of weeks ago (gasp! I know, right?) Of course, you could use any combination of toppings that tickle your fancy – let me know what you come up with!

vegemite scrolls

Dough

450 g / 3 cups plain flour

2 tsp sugar

1 tsp salt

250 ml water

2 tbs olive oil

3 tsp yeast


Toppings

Vegemite / tasty cheese

Bacon pieces / tasty cheese

Shaved turkey / Camembert cheese / cranberry sauce Salami / spinach / tomato chutney / mozzarella cheese

In a large bowl, place measured ingredients in the order listed above. Bring together and mix with your (clean!) hands until you form a dough. Remove from bowl and place on a flat, floured surface and knead for ten minutes…you can thank me for the workout when you’re done. Place back into the bowl and cover with oiled plastic wrap. Tip: olive oil in spray form on Glad Wrap works brilliantly. Place in a warm spot for aprox 30 minutes, or until your dough has doubled in size. After rising, punch the dough down with your fist and repeat the kneading and rising process.

Preheat oven to 200 degrees C.

To make, divide your finished dough into two equal pieces. With a floured rolling pin, roll each piece out into as much of a rectangle as possible, around 1/2 cm thick. Keeping the widest part of the rectangle dough closest to you, spread generously with desired toppings. Carefully roll the dough up away from you, and then cut into 2cm thick slices. Place each scroll onto a greased oven tray and brush with egg. Bake for aprox 20 minutes, or until your scrolls begin to turn golden brown or cheese is bubbling.

Best eaten immediately!

turkey scrolls

My Cook Club: Easter Chocolate Loaf

Leave a comment

It’s almost Easter, and I have to confess this recipe was one of the trickier ones I’ve put together for Cook Club! After being inspired by an extremely delish photo I found online, I set about making my own version (of what looked like a really simple recipe) to share with you guys. Alas, I need to remember things on the internet can be deceiving! But never fear, Cook Clubbers, after three trials, we now have a simple, pretty much fail-safe Easter Loaf so full of chocolatey goodness it might just send us all into a diabetic coma.

choc loaf 4

Easter Chocolate Loaf


WHAT YOU NEED:

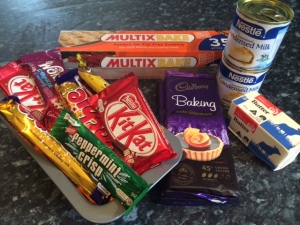
Mixed chocolate bars. I used Cherry Ripe, Peppermint Crisp, Crunchie, Kit Kats, Wonka’s Cookie and Cream and mixed mini Easter eggs (but nothing too creamy – I made that mistake in attempts one and two). Look for bars that have colourful insides.

400g dark chocolate, chopped

50g butter, cubed

1 tin of condensed milk

A loaf tin

Grease proof paper (or similar, to line your tin)

choc loaf 1

Ingredients


HOW IT’S DONE:

Prepare your chocolates by unwrapping them all, maybe cutting some in half. You’ll need to work fast so have everything handy. Line your loaf tin with cooking paper.

In a medium saucepan set to a low heat, melt butter and condensed milk together, stirring constantly. Once they’re combined, add the chopped chocolate all at once and stir like crazy. It will come together thick and fast, so use your muscles.

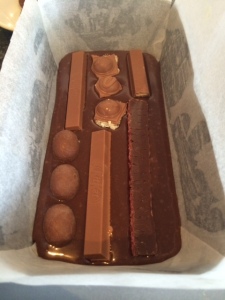
Once your fudge base is combined, layer it in the tin with your prepared bars and Easter eggs, giving the tin a light tap between layers to get rid of any air bubbles. Continue layering bars, fudge, bars until you fill the tin to the top. Refrigerate for 24 hours, or at least overnight. When set, turn out of tin – you might need to give it a good tap on the bottom – and slice.

**Confession – my loaf tin is quite deep, so I ended up doubling the fudge mixture. Next time, I think I’ll add more bars and less fudge.

** Don’t be afraid to experiment! I think using milk chocolate in the fudge mix would work well – dark choc made this recipe very, very rich…though my family aren’t complaining! I’d love to see what variations you guys come up with.

choc loaf 3

Yum!

choc log

The inspiration!

My Cook Club: White Chocolate and Macadamia Nut Cookies

Leave a comment

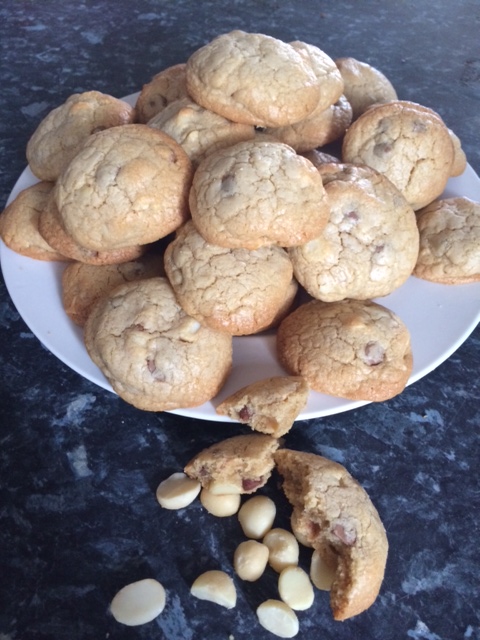
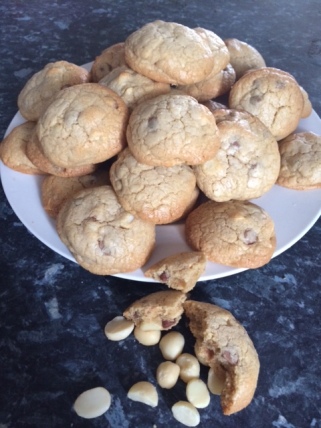
Crisp on the outside, chewy on the inside, white chocolate and macadamias. What more you could ask for in a cookie?

This is a huge recipe – not in time or effort, but certainly in the amount of cookies you’ll have left to devour once it’s done. My family of boys can manage a double batch without a problem, you (and Bel) might decide to half the amounts I’ve given here.
WHAT YOU NEED:

1 cup of softened butter. No, not margarine. Butter.

1 cup of white sugar.

¾ cup of brown sugar, packed.

2 tsp of vanilla extract.

1 tsp of salt.

2 large eggs.

3 cups of plain flour.

1 ½ tsp baking soda.

150g chopped macadamia nuts.

150g white chocolate chips.

mac cookies raw
HOW IT’S DONE:

Pre heat your oven to a low 140 c. In a large bowl, beat together butter, sugars and vanilla extract until it turns fluffy and takes on a lighter colour. An electric mixer will make your life easier, but it’s not essential for this recipe. Then add eggs one at a time. The mixture might appear to curdle at first, but it will come together.

In a second bowl, mix flour, baking soda and salt. Gradually add this mix to the butter and egg mixture until all combined. It’s seriously easy to end up in a big mess with flour flying everywhere if you don’t take your time with this bit. Go on…ask me how I know! Or, maybe don’t. Add the chocolate chips and macadamia nuts at this point. You might want to get your hands in there to mix until pretty much even.

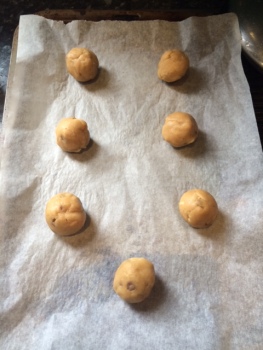
Line a baking tray or three with baking paper (my favourite thing in the kitchen, saves on washing up). Spoon one tablespoon of mix into balls in your hands, then place on tray. Don’t place too close together, as they WILL spread. Cooking time is only about ten to eleven minutes – you won’t think they’re ready yet, but look for the slight golden brown change in colour around the edge of your cookies. They’ll still be quite soft. Allow to cool for a minute or two, then slide off with a spatula. Overcook and you’ll lose that lovely chewy consistency. Of course, if you prefer your cookies with that bit more crunch, then by all means bake for a little longer.

mac cookies

My Cook Club: Triple Layered Chocolate Pavlova

Leave a comment

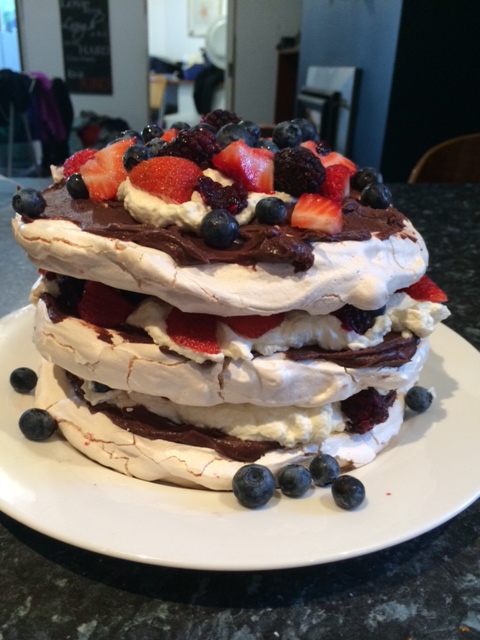
For Cook Club this month, I decided to make one of my favourite desserts – spectacular and far simpler to make than you’d think, but it’s a bit too full-on for everyday. Here in Australia, where we celebrate Christmas in summer and our delicious berries are in season, well, a triple-layered Pavlova has to be the perfect Christmas Day dessert ~ Mandy

What You Need:

  • 200ml of egg whites. I find it easier to measure egg whites this way, because at my place the eggs come in all shapes and sizes from our backyard chickens.
  • 1 ½ cups of caster (super fine) sugar.
  • 200g of dark chocolate.
  • 400 ml of cream: 200ml for whipping, plus another 200ml for mixing with the chocolate.
  • Mixed berries. I used strawberries, blackberries and blueberries.
  • 2 ½ teaspoons of white vinegar.
  • 3 tablespoons of cornflour.

????????????????????????????????How it’s Done:

Preheat oven to 130 degrees C. Line three baking trays – I use pizza trays – with baking paper, and mark a circle on each, aprox 20cm in diameter and set aside.

Very carefully separate your egg whites from the yolks. I use a groovy little kitchen gadget that I think came via Tuppaware years ago, but on the days when that gets lost in my junk drawer, just cupping your (clean) hand and letting the whites slide through your fingers does a pretty good job.

Using an electric mixer, beat egg whites on their own until they turn white with foamy peaks. Add the caster sugar little bit by little bit on medium-high. Be patient! Make sure each sugar edition has dissolved before adding the next lot. An easy way to check this is by rubbing a little mixture between your fingers. If you can still feel grit from the sugar, beat a little longer. Once complete, your mixture should be white, stiff and very glossy. At this point, add the vinegar and cornflour to stabilise the mix (Confession – I forgot to add the vinegar and cornflour, but it still worked.)

Divide mix into three, and spoon onto your baking trays. Using your circles as a guide, smooth out mixture as much as possible, and keeping the sides tidy. Add to the oven, turn heat down to 120 C. Bake for 1 hour, 10 mins (Confession – mine were ready at one hour exactly, so do keep an eye on them), then turn off the oven, open the door and allow the meringues to cool completely.

While your meringues are cooling in the oven, melt the chocolate over a double boiler with 200ml of cream. A double boiler is basically a saucepan with a little bit of water in it and low heat, and another large bowl placed directly over it. Don’t allow steam or water to come into contact with your chocolate. Stir constantly, and eventually it will come together in a chocolate sauce. Allow to cool.

Prepare berries, and whip remaining 200ml of cream. I always add a dash of vanilla extract. On a serving dish, very carefully place one of your cooled meringues. Using about a third of your chocolate ganache mixture, smooth on top of the meringue, followed by a third of the whipped cream and berries. Place your second meringue on top and repeat the process, then the final meringue, chocolate, cream and berries.

For serving on Christmas Day, you could add more berries to the plate, tinsel or baubles to decorate.

Good luck Cook Clubbers, I’m looking forward to seeing what Bel comes up with!